Messy Hairstyles

Sideswept hair: Curtain bangs redux

blog5.jpg

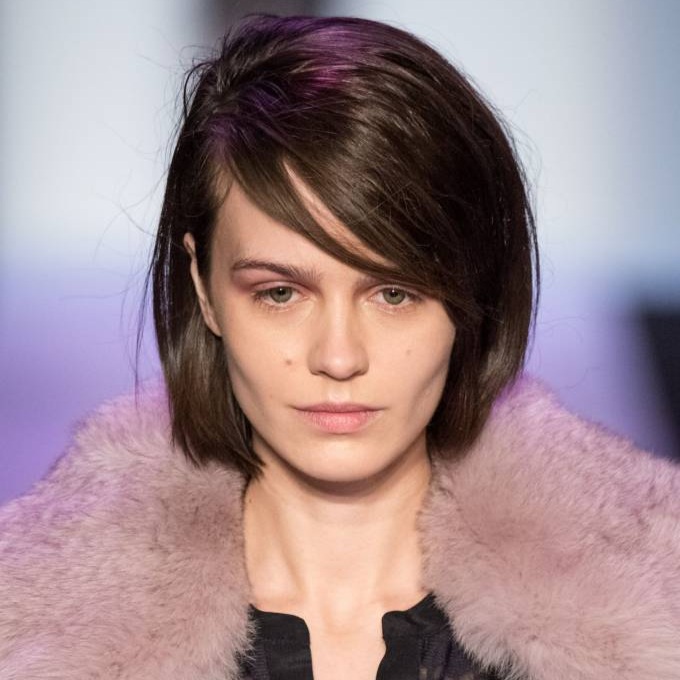
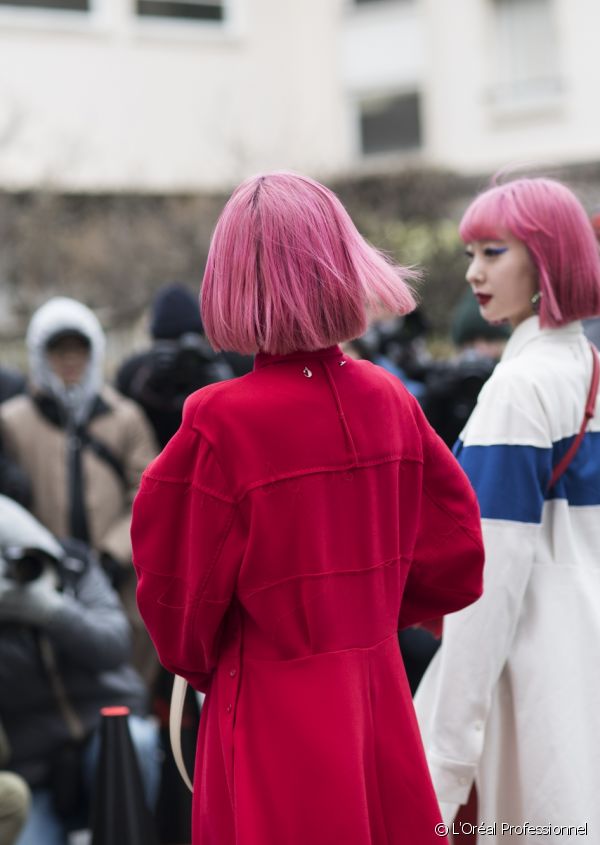
Remember when curtains bangs à la Brigitte Bardot were top of the trends when it came to hairstyles? If however, like us, you weren't around for the 60s parted-fringe sensation, now's your chance to hop on the bangs bus and try out the retro take on sideswept hair with a chic pair of curtains!

Left, right or bang in the middle?

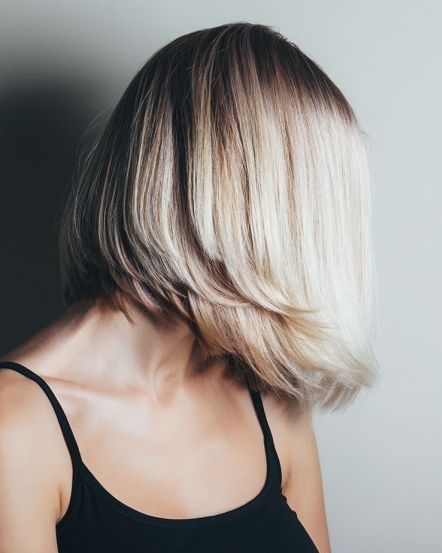
Ever fuss over whether to style your hair to the left or right, and which is your "good" side? Well, now you can forget all that, as curtain bangs offer a balanced solution – right down the middle. But instead of giving you a rather strict centre part, the subtle curve of the bangs is just as flattering as a side-swept style, without having to pick sides and (we won't tell if you won't) without you even needing real bangs in the first place...

The key to the look? It's all about forward thinking.


b1.jpg

How to style curtain bangs

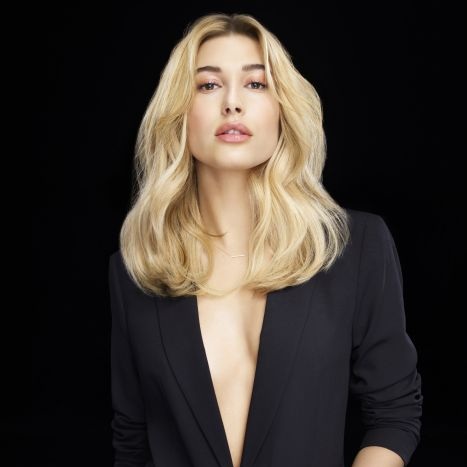
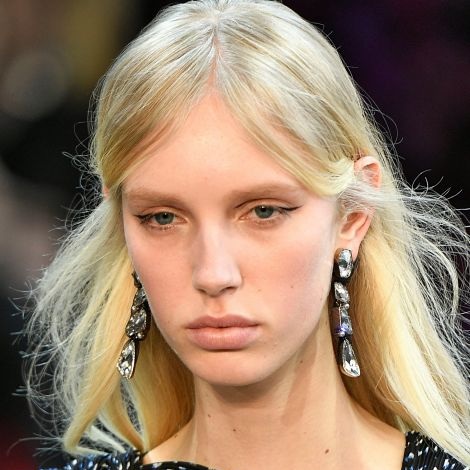
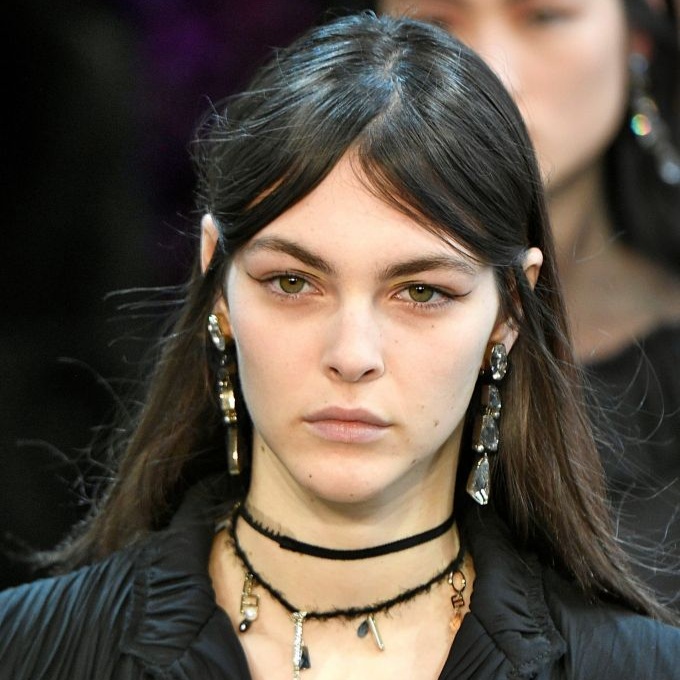
Celebrities like Bardot (and her modern-day counterparts Alexa Chung and Hailey Baldwin) committed to the curtain bangs by getting their hair cut so that the shortest part of the fringe fell right at the center of the face, tapering down in length to form an inverted V shape. But even those who don't want to snip can work the faux curtain version. Here's how:

Step one.

Wash and condition hair with smoothing products to prevent frizz. The offers a variety of smoothing formulae for different hair types and concerns.

b2.jpg


Step two.

Dry the front section of hair over your forehead. When half-dry, apply a small amount of from Dual Stylers.

Step three.

Comb the hair into two sections, separate at the centre, then finish drying using the concentrator nozzle on your blowdryer.

Step four.

Tuck the ends of the two sections behind your ears, allowing the lengths to drop slightly to form a curve. Close your eyes and finish with a spritz of , and secure the ends behind your ears with bobby pins if needed.

Now that's a hairstyle truly fit for a curtain call... Applause!

Article originally posted on: http://magazine.au.lorealprofessionnel.com

The bob with a side-swept fringe

BLOG+3.jpg

Not much effort is needed to change the appearance of your face. A classic bob with a straight fringe compared with one with a side parting and fringe are very different looks. But it's not a one-or-the-other decision: they both come from the same cut!

Swept to one side, a fringed bob brings softness

Contour some softness and curves into your clean-cut fringed bob. For this, the parting should be moved to one side, with the fringe sweeping to the opposite side. This creates the effect of a rounded bob, gracefully and subtly surrounding the face.

Length and body: the all-in-one bob

According to Denis Holbecq, hair stylist ambassador for L'Oréal Professionnel, the side-swept bob is 'the right length to elongate a long face and give it some character, but also to balance out a triangular face'. Clearly no matter what the face shape, this cut brings a sophisticated shape to hair.

The side-swept fringed bob: a relaxed yet posh look!

This cut is a celebrity favourite. Not just for its relaxed yet chic appeal, but also for its easy maintenance. Perfect for today's hustle and bustle when a hair faux-pas is absolutely not on the agenda!

Article originally posted on: http://magazine.au.lorealprofessionnel.com

Finger waves: 3 ways to wear this look

Blog2.jpg

Ready to let your finger wave flag fly? Check out these three 'dos which will help you rock this look!

What are finger waves?

Finger waves are 'S' shaped waves that adorn a lot of retro hairstyles. They originally appeared in the 1920s, but have since re-emerged as a popular way to bring some Va Va Voom to a range of looks, for both short and long hair. The easiest way to achieve them is to comb a curling gel like in damp hair to encourage the natural texture of your locks. Once you've sculpted the hair into the signature S shapes with a comb or thick barrelled curling wand, use a strong hold spray like to lock that look into place.

Flowing Finger Waves

You don't need to have the traditional 1920s flapper bob to be able to rock finger waves. Those with longer locks can now sport this style, by leaving the waves to flow free and elegantly frame the face. Brush your hair through with a loose comb (or your fingers!) before spritzing with hair spray, to make sure the style doesn't look too strict. From here, the waves can easily be lightly pinned back into a half up or full updo, the possibilities are endless! Try experimenting with a centre or side part to change up this look.

Finger Wave Fringe

One large finger wave along your fringe is a fantastic way to showcase this style. Make sure you curl all your hair in the same direction so that when you collect the curls together in one big finger wave, every strand is going the same way. Alternatively, you can use a foam roller with pin curls to set the section you want to get your finger wave on.

Long Luscious Retro Waves

This longer look can be achieved with gel and fingers over the top of your head, finishing with a curling iron along the lengths. The larger the barrel of the curling iron, the larger the waves. Start with creating a deep side part in your hair before incorporating gel through the roots and lengths, and then carefully creating each wave, curling away from your face when you use your iron. Gently rake through the waves to gather them together, and try a wet look spray like to give your style a super shiny and high fashion finish.

If you are stuck for finger wave inspiration, head to your nearest L'Oréal Professionnel salon to let a stylist work their magic!

Article originally posted on: http://magazine.au.lorealprofessionnel.com

How to recreate these preppy wet look finger waves

Blog1.jpg

The 1920s were a decade full of fashion firsts and iconic hairstyles, of which perhaps the most well-known are the slick and shiny finger waves. With retro hairstyles as popular as ever, we take a look at how you can easily recreate the wet look finger waves at home, and give some vintage glamour to your look!

6 steps for wet look finger waves

You will need: shampoo, conditioner, comb, long bobby pins, wet look gel, hairspray.

Step 1. Wash your hair with a smoothing shampoo and conditioner such as those from the Liss Unlimited collection by Serie Expert. After rinsing, comb through your wet hair very gently to remove any tangles and make a centre part. Do not blow-dry.

Step 2. Separate a section of hair (roughly 3-5 cm wide) at the side of your head, by the hairline. Tie up the rest of the hair to keep it out of the way.

Step 2. Take a pea-sized amount of gel (or more if your hair is particularly thick/rebellious) and apply to the separated section. We recommend the . Make sure the gel covers all the section, from root to tip.

Step 3. Comb this section through and hold the ends straight with one hand. With the other, take your comb and position it in the hair, 2-3cm from the roots.

Step 4. Push the comb towards the center part so the hair naturally bends into a deep curve. Replace the comb with a long bobby pin to secure in place. Place the comb another 3cm further down the hair and repeat, with the bend forming in the opposite direction. Secure with another bobby pin.

Step 5. Repeat every 3cm until you reach the ear level, tucking any remaining hair behind your ear. Blow-dry the rest of your hair and tie into a loose messy bun.

Step 6. Once the rest of the hair is dry, carefully remove the bobby pins and use a high-shine hairspray like L'Oréal Professionnel's , a favourite for the catwalk, to secure your finger waves in place.

That's all there is to it. Shiny, wet look finger waves inspired by the 1920s!

Article originally posted on: http://magazine.au.lorealprofessionnel.com

The braided crown, a reigning hairstyle for long hair

96-the-braided-crown-a-reigning-hairstyle-680x0-1.jpg

You don't need to marry a prince to wear a crown! To gracefully reign over the hairstyle kingdom, long locks are all you need. Let's take a closer look at the braided crown, the key to stylishly ruling this season's hottest trends...

Everyone wants to wear the crown!

No need to invest in a bejewelled band to wear a crown: a braid, plaited all the way around your head, is a much finer option. Those lucky ladies with lots of hair can even cheat a little, wrapping a regular braid along the contours of their face. Regal or bohemian, you get to choose how to wield your royal power.

Hair born for the throne

According to Delphine Courteille, hairstylist at L'Oréal Professionnel, all shades of long hair can try the braided crown. Rather, it's the type of hair that can make or break the style: 'For this look, it's best to have medium to thick hair, and lots of it, to create the necessary volume so the braid doesn't fall flat.' For layered hair, this style is best avoided, as holding it up would require too many pins!

Long live the hairstyle

You need more than regal posture to keep your crown in place. So that sections of the braid don't slip out and undo completely, like Rapunzel in the tower, you need to add grip to the hair using texturising products. Delphine Courteille recommends Next Hair Day or Texture Dust by L'Oréal Professionnel for both professionals and amateurs alike.

Article originally posted on: http://magazine.au.lorealprofessionnel.com  

HAILEY BALDWIN'S HAIR SECRETS REVEALED!

1207-hailey-baldwin-the-new-spokesperson-for-468x617-1.jpg

Hailey Baldwin is a current reigning style icon. Boasting over 8 million Instagram followers , the model has become renowned for her bold, urban chic style that echoes through her outfit, hair and make-up choices. It's not uncommon to see Hailey teaming a leather jacket with a comfy sweatshirt and sneakers one day, only to switch her style to fierce micro-shorts or a figure-hugging beaded dress the next. As for her hair? Hailey's constantly evolving style and colour keeps us on our toes! Clearly the offspring of Stephen Baldwin knows that the right hairstyle can make or break a fashionable look.

Hair Secrets Revealed

Want to know a bit more about Hailey's gorgeous mane? Here the model reveals a few of her insider secrets...

# 1 Her favorite hair colour is blonde: Hailey confirms that her signature blonde locks are her go-to hair colour. "Blonde reminds me of my hair colour as a child. It symbolizes innocence and truthfulness. I often ask my hair colorist to go blonde."

#2 She uses an oil-based product to keep her locks glossy: "I can't live without my Mythic Oil Crème Universelle with its delicious argan and almond oil fragrance. I use it to relax my hair after a shoot, or as a hair cream before styling."

#3 She's a hair colour chameleon: Blonde may be her favourite hair colour, but Hailey is also a fan of experimenting. "It's amazing how something as simple as hair colour can change everything. I feel that my mood is completely different."

Hairstyle In Focus

If there's one look we absolutely adore on Hailey, it's when her hair is fashioned into glossy textured waves. As seen in the above image, this hairstyle perfectly encapsulates Hailey's modern and sultry look. What we love most is how incredibly healthy her hair looks, even with a slight tousle through the mid-lengths and ends. Styling the hair with a middle part is a masterstroke, giving the look an air of sophistication. Meanwhile the hint of darkness at the roots is a nod to Hailey's naturally easy-going personal style. Overall this style is the epitome of a look that will take you from day to night.

Its official - Hailey Baldwin, is our new hair idol when it comes to playing with colour and style!

Article originally posted on: http://magazine.au.lorealprofessionnel.com  

10 trendy hair colours you still need to try

Whether you prefer blonde, brunette, red or even a less natural shade, there's an option for you on our list of the top ten trendy hair colours you must try!

1. Cool ash brown

Perhaps one of the most trendy hair colours for brunettes, cool ash looks incredible on cool skin tones and light-coloured eyes. Keep any unwanted red undertones at bay with the for Brunettes. Alternate with your regular conditioner for healthy and shiny ash brown hair.

2. Beige hair

Cool sandy tones are the lighter equivalent of ash brown. Beige hair contains tones from the blue/green end of the colour spectrum, and is a particularly trendy hair colour for short hair. Keep beige from being boring with a stylish haircut: blunt bangs or layered lengths can lift your entire look.

3. Visible roots

Growing your hair out doesn't have to mean months of hat wearing to hide unsightly roots. In fact, the dark roots + light lengths look is actually a trendy hair colour combination all on its own these days! Because the focus is on the roots, don't let them get greasy. A dry hair shampoo will soak up any excess oils and give you a boost of volume.

4. Buttery blonde

A warm blonde that isn't yellowy, this creamy blonde shade will make you want to melt into its softness. Wear in shimmery long waves for a 1920s appeal.

5. Hair strobing

Update your look instantly with a few carefully-placed highlights using the "strobing" technique. Your stylist will use their expertise to place light sections exactly where the sun would hit. Put the winter months behind you with this ultra-flattering and subtle colour technique that looks as if you've spent some time on a sun-soaked beach.

6. Bronde

Hesitating between going blonde or brunette? Do both with bronde! It's not just a transitional shade, it's been one of the most trendy hair colour ideas this year. Bronde can be achieved either with an all-over dark sandy shade, or you can mix highlights and lowlights to give your hair depth and shine.

7. Auburn

There are different shades of auburn to suit your skin tone. It's up to you how much of the red you want to wear: from woody chestnut to dark ginger, it's all about rich natural shades. Red tones can look good on any skin colour, but talk with your stylist about whether you want cooler pink undertones or warm orange ones.

8. Rose gold

Rose gold, hands down one of the most trendy hair colours in 2018, can also exist in a brunette version with dark strawberry tones. If you don't want to go all-over strawberry however, a few subtle highlights of a dusky pink can really bring radiance to your complexion.

9. Copper

Truly shimmering metallic copper is an unforgettable colour. Keep your shine by using a serum or hair oil on the lengths and ends. We particularly love big copper curls!

10. Bright pink

You can't get a more trendy hair colour than shocking pink. Remember, to avoid your fresh colour fading or developing any brassy undertones, use a colour-protective shampoo and conditioner.

Article originally posted on: http://magazine.au.lorealprofessionnel.com  

Why chocolate hair colour is the perfect choice for this winter

post3.jpg

Chocolate hair colour is one of the most popular shades for colder weather. But why? Here we look at the top reasons why chocolate hair is gaining steam, how you can get in on the trend next year.

Three reasons to love chocolate hair colour

1. Warmth. The slight hint of red undertones in chocolate help to bring out the warmth in your complexion. This also explains why certain cool shades of hair colour (or the wrong one for your skin tone) can do the opposite: draining your face of warmth and making you look tired and ashen. Not so with chocolate!

2. Radiance. Freshly coloured chocolate hair colour is great for reflecting the light. This then makes the hair appear fuller and more voluminous – great for people with fine or thinning hair looking for an instant boost.

3. Thickness. Brown hair colour is gentler on your hair than lightening. Permanent lightening requires the cuticles of the hair shaft to be lifted and the natural colour removed underneath. Going darker, however, involves colour being deposited onto the hair shaft. Some people even find their hair feels healthier and thicker after dying it brunette.

Different chocolate shades to suit your skin

There isn't just one shade of chocolate hair colour! Your stylist will create exactly the right combination of pigments to suit your hair hopes and skin tone.

Chocolate hair colour with caramel highlights: if you're going from blonde to chocolate, or simply want a few bright streaks to give your hair dimension, this could be your solution. Caramel isn't too far from chocolate on the colour spectrum, so the highlights won't look to harsh.

Dark chocolate hair colour: For a really rich hair colour that will keep you warm through the winter seasons, opt for a deep dark chocolate shade. To keep the shine whatever the weather, apply a few drops of serum after washing. We love the Liss Control Plus serum by Tecni.ART.

Milk chocolate hair colour: A more neutral alternative when it comes to chocolate hair colour is a milk chocolate version. It has fewer red tones, so really suits those with naturally cool undertones to their skin.

5 ways to wear warm brown winter hair

So once winter rolls around again you're going to book an appointment with your stylist to take your hair to a new shade of chocolate brown. But how are you going to style it? Here are five of our favourite ways to wear this beautiful brunette colour...

1) Wavy bob: give your bob a boost with a modern matte finish using the Super Dust powder by Tecni.ART. Simply sprinkle into your palms and run through the lengths for mattified volume.

2) Big bouncy curls: if your hair isn't naturally curly, no problem. helps you create voluminous and natural-looking curls.

3) Textured pixie: short hair? Chocolate hair colour gives body and shine to short hair cuts. Consider trying a cool or neutral shade for a really contemporary look.

4) Sleek and straight: show off your brunette radiance with long sleek locks. If you use a hair iron, be sure to apply heat protectant beforehand to prevent any hair damage.

5) Fishtail braid: a braid is a great way to showcase the different tones in your hair – perfect for chocolate hair colour with caramel highlights!

With all the benefits of chocolate hair colour, as well as the numerous options for styling all different hair lengths and types, are you tempted to take the plunge and be a beautiful chocolate brunette later this year?

Article originally posted on: http://magazine.au.lorealprofessionnel.com  

5 STREET STYLE-INSPIRED OFFICE UP-DOS

Post 4. photo 1.jpg

Go from the boardwalk to the boardroom with a street-style inspired up-do. We've scoured the pavement to find five easy looks that are perfect for the work day.

The chic chignon

The chignon has always been an office wear staple, but this street-style take on the look is a little more tousled. Perched high on top of the head, this chignon keeps your hair out of the way as you work, while also flattering a long and elegant neckline.

post4.photo3.jpg

The slick bun

 A slick bun is another office favourite for its workplace practicality. However this sleek and smart bun is placed a little lower down for a more refined finish. To create the look, simply start with a ponytail and then twist the tail into a bun shape. Finish with a touch of L'Oréal Professionnel Infinium Pure hairspray to set the style and smooth down any flyaways.

Post 4.photo2.jpg

The clipped knot

Need to focus on the task at hand without worrying about what your hair is doing? Then this clipped knot is the style for you. The little knot sits low at the nape of the neck and is held together securely by either a clip or a clasp. This no-nonsense look is perfect for everyday wear – or you can jazz it up by adding in some oversized accessories.

Post 4. photo 1.jpg

The loose tail

Ponytails have an unjustified reputation for being boring, but this loose interpretation has a relaxed and feminine feel. This hairstyle tames your mane, while still having a soft face framing finish. For a bit of extra oomph try backcombing and applying L'Oréal Professionnel Série Expert Volume Master before creating the pony.

post. photo5.jpg

The high flicked bun

Take a high ponytail, fold it over and voila, you've got yourself a high flicked bun! This quick'n'easy hairstyle is perfect for mornings when you've got very little time to get ready and need to look your best. Healthy hair is a must with this look so be sure to use a L'Oréal Professionnel hair care range suited to your current hair condition.

post.photo6.jpg

Article originally posted on: http://magazine.au.lorealprofessionnel.com

STRANDLIGHTS ARE THE MOST NATURAL HIGHLIGHTS YOU'VE EVER SEEN

Major changes aren't always big-ticket changes. Subtlety goes a long way, as these photos show. Before things looked good, but after ... wow! That is the subdued beauty of hair contouring.

Depth through tones

The artistry involved in hair contouring makes you into the masterpiece. Dark tones create shadows, and these visually reduce the length of the face and make it appear narrower, while lighter tones, which reflect the light, create the look of an elongated face. It's all about balance, creating the optical illusion of a more oval, more symmetrical shape.

Accentuate the positives

We've all learnt (or at least practiced!) how to mix and blend makeup to enhance our cheekbones and make our eyes shimmer. Before and after photos are always inspiring. And sometimes they're a little like a game of 'spot-the-difference' – we can see the change, but not always immediately know how it happened! Through tailor made colour techniques the "after" results of hair contouring are incredible, but still look natural, and are specifically created for each person.

Bespoke style

The individual approach that hair contouring demands is one of its strongest advantages. Your hair stylist works with you to identify the shape of your face and how to enhance your best features ... then through precisely applied colour and highlights, they frame your face to create your new look. The before and after won't be a shock, your friends will still recognise you – but Hair Contouring will be your best kept beauty secret. It's been the beauty go-to of the stars for a long time, and now you can experience Hair Contouring at exclusive L'Oréal Professionnel salons for yourself.


Article originally posted on: http://magazine.au.lorealprofessionnel.com